DAS is often used as a photosensitizer with various proteins and polymers in alternative photographic processes. In carbon transfer printing, DAS makes the gelatin sensitive to UV light and allows for the creation of a photographic image.
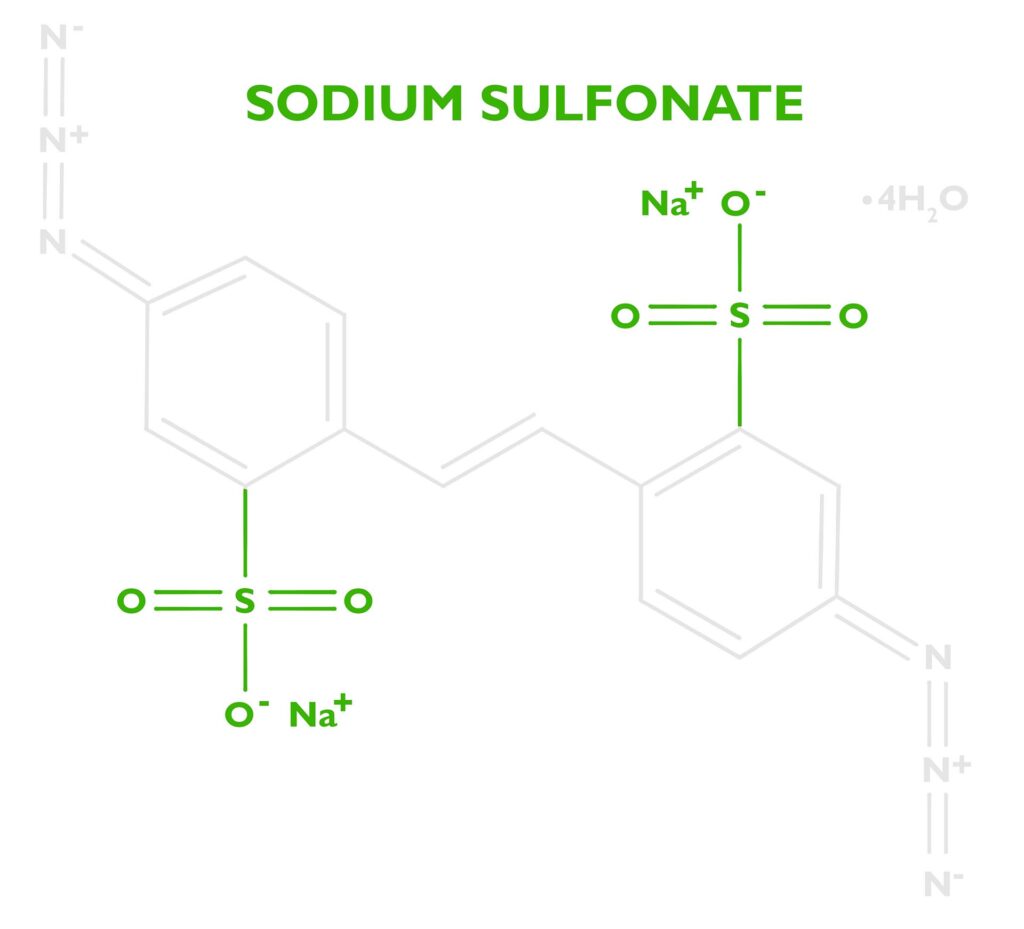
DAS (sometimes DAZST-Na) is short for Disodium 4,4’-diazidostilbene-2,2’-disulfonate tetrahydrate (CAS 2718-90-3). That’s not easy to pronounce, but let’s break it down to understand how this reagent helps create a carbon transfer print.
At the base of the molecule is a stilbene dye (stilbenes are eco-friendly and can be found in wine, berries, and other plants). Industrially stilbene is used as a precursor to many dyes and optical brighteners, but in certain applications, it can used to manufacture photosensitizers. Dyes are often a good option for controlling photochemical reactions because they efficiently absorb certain portions of the electromagnetic spectrum, which allows chemists to tune the molecule to react at certain wavelengths. DAS is ‘tuned’ to absorb the UV-Light from a metal halide lamp. Stilbene by itself isn’t enough to sensitize gelatin. Its only purpose is to absorb energy then transfer it somewhere else.
The energy absorbed by the stilbene will be transferred to a photoreactive functional group called an azide. DAS has two of these at either end of the stilbene molecule. See the nitrogen triplets in the photo to the right. Because there are two we’ll say Diazido. Diazo sensitizers are also popular in alternative photographic processes, which are based on two azos N≡N. Both diazos (N≡N) and diazidos (N=N=N) serve the same function.
When stilbene pumps enough energy into the azide, the azide releases nitrogen gas N2, leaving behind a free radical nitrene. The nitrene is unhappy since it only has 6 electrons in its outer shell and it wants to have 8, so it’s looking for something to bond with.
The free radical nitrene is going to covalently bond with the gelatin, inserting itself between a carbon and a hydrogen on the gelatin molecule. See this article on C,H-insertion if you would like to know more.
If the crosslinking process happens enough times, the gelatin won’t melt when placed in hot water. Below is a short description of the carbon transfer process to aid in the visualization of how the crosslinking of gelatin allows for the formation of a photographic image. The two videos to the right/below will also aid in visualizing the process.
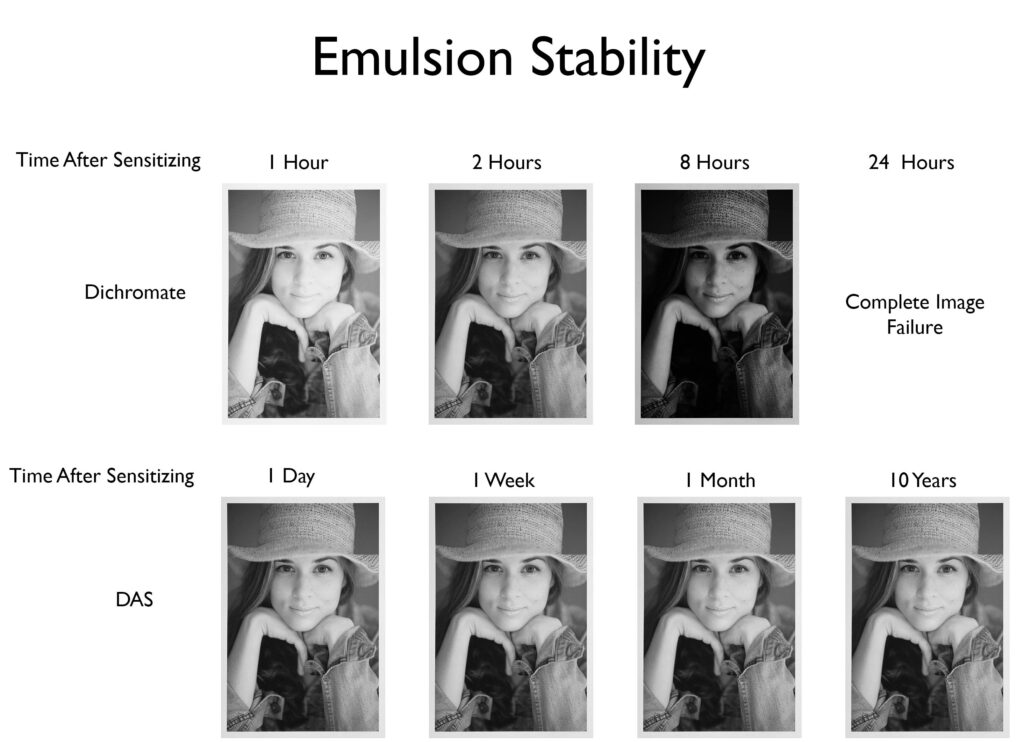
Stable- In traditional carbon printing, potassium or ammonia dichromate are used to sensitize the gelatin. As soon as the emulsion is sensitized with dichromate, the dark reaction starts. This means the speed of the emulsion is constantly changing. Imagine putting ISO 100 film in your camera in the morning, by late morning it will be ISO 200, by lunch ISO 400, in the afternoon ISO 800, and before you can develop the film it will be completely fogged. Plus, after you expose a dichromate-sensitized emulsion, even after the exposure unit is turned off, the chemical reaction continues. This makes calibration frustrating. With DAS there is no dark reaction and no continuing action of light, so calibration is easy.
Less Toxic than Dichromates– Potassium and Ammonia dichromate are known carcinogens. The DAS sold by The Wet Print carries the Arts and Creative Institute’s cautionary label because there have been no direct studies on the toxicity of DAS. However, computer modeling I had done by the toxicology department at Duke University and comparison to similar reagents show that the toxicity of DAS is most likely low. Much better than dichromates. That said, I personally still wear gloves when handling DAS and developing.
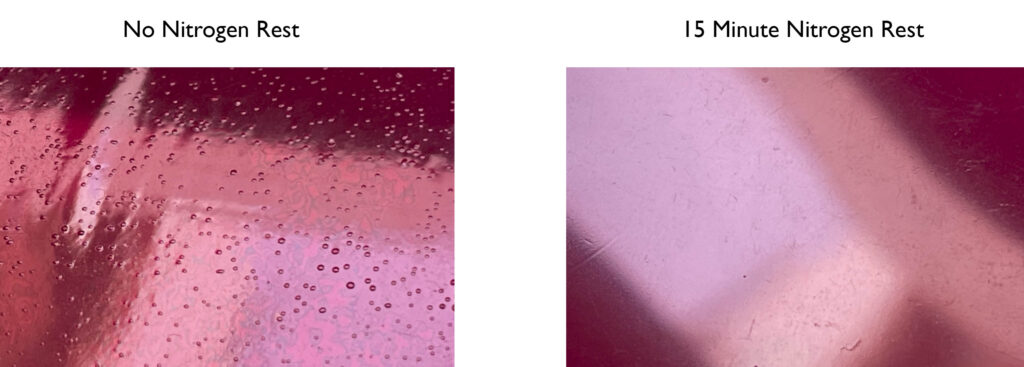
Smooth Prints– The standard practice in traditional carbon printing is to sensitize the emulsion with a brush or roller. This can easily lead to uneven tone in a print. Since DAS is stable, it can be mixed directly into the emulsion, resulting in a very even distribution of the sensitizer. Below is an example of how smooth DAS-sensitized prints can be.

Faster workflow: Since DAS can be mixed into the emulsion, there is no need for the sensitizing step. I just grab an emulsion from storage and place it directly into the vacuum frame for exposure.
When UV light reacts with DAS, three things happen: (If you have ever taken a workshop with me, you’ll be very familiar with these because I drill them into students the first two days.)
Think of any medicine, there is the desired effect and the unwanted side effects. The desired effect of DAS is to crosslink the gelatin, but when UV light reacts with DAS, nitrogen is released and a stilbene dye is left over. Understanding those three products will be crucial to creating a stress-free and successful workflow with DAS.
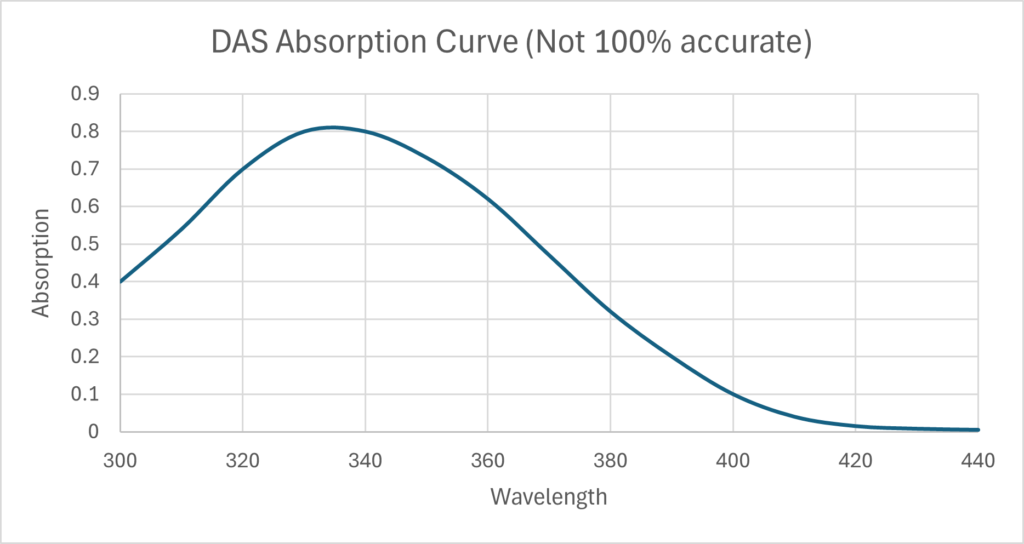
Crosslinking of gelatin. When Disodium 4,4’-diazidostilbene-2,2’-disulfonate tetrahydrate absorbs enough energy, the Azide produces nitrogen gas and a free radical nitrene. The nitrene then crosslinks two gelatin proteins, so the gelatin will not melt in hot water. A concentration of 3g to 6g of DAS to every 100g of gelatin is good. Below 3% there is insufficient crosslinking and the gelatin will melt in hot water. More than 7% and the two side effects, self-masking and nitrogen bubbles, become a problem. The wavelength of your light source must align with the absorption curve of DAS shown to the right. For example, using a 420nm light source will not cause any crosslinking.
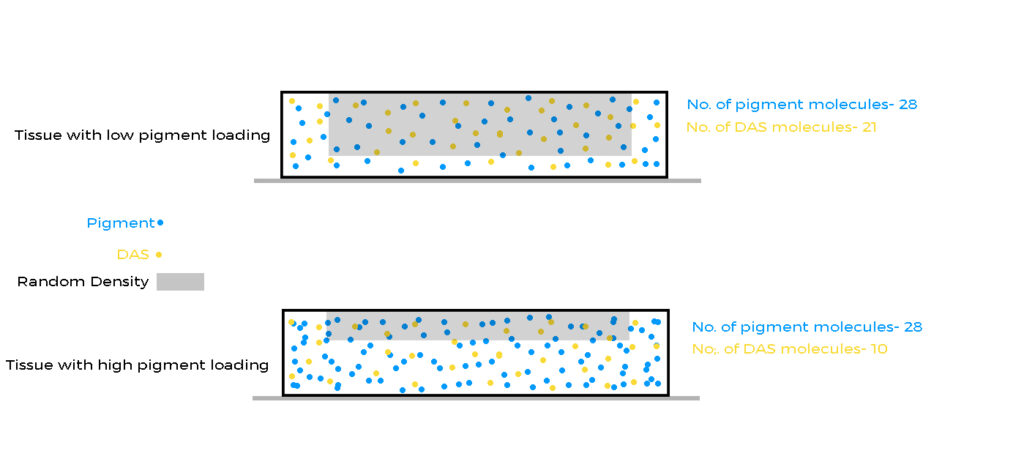
Self Masking. (I will be updating this soon. During research for the book on gum printing, I have realized that self masking is very different from what I have stated below.) One of the products of the reaction between DAS and UV light is a stilbene dye. This dye is a brown color and very good at blocking UV light. See the illustration below.
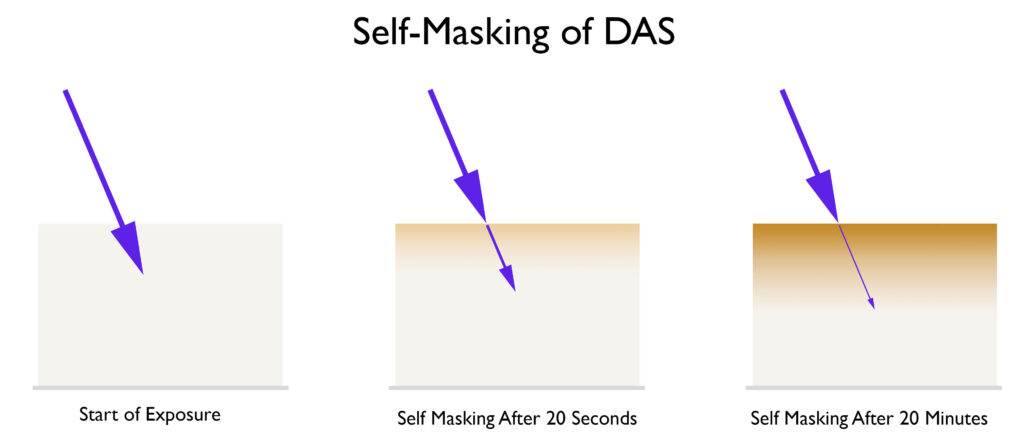
Look at how the dye absorbs more and more UV energy as the exposure progresses. Therefore, more and more energy is needed to penetrate deeper into the emulsion, which is why it can be difficult to achieve a good black, especially when a person is accustomed to working with dichromates and a low-contrast emulsion. The key to getting a good black with DAS is to increase the contrast of the emulsion. This is a double-edged sword. As you increase the contrast of the emulsion, higher densities will be easier to achieve, but the highlights will suffer when using continuous tone negatives. This is one of many properties you will need to balance to be successful in carbon printing, or at least make the process less frustrating. At the end of workshops, I go through a ‘balancing act’ that helps people balance variables like the one above and create a workflow that works well for them. Below are a few ways you can increase the contrast of your emulsion.
Imagesetter negatives make DAS easier to work with because halftone negatives do not have the same problem as continuous tone negatives in the highlights, therefore using a high-contrast emulsion is not a problem. See here if you are unfamiliar with that previous statement. If you are in Europe, you can get imagesetter negatives from www.flexografico.com or www.heinatz.hamburg/computer-to-film/ and if you are in the USA, contact Michael Strickland www.michaelstricklandimages.com. DAS can also be used with continuous tone negatives. It takes more practice than using halftone negatives, but the results are worth it.
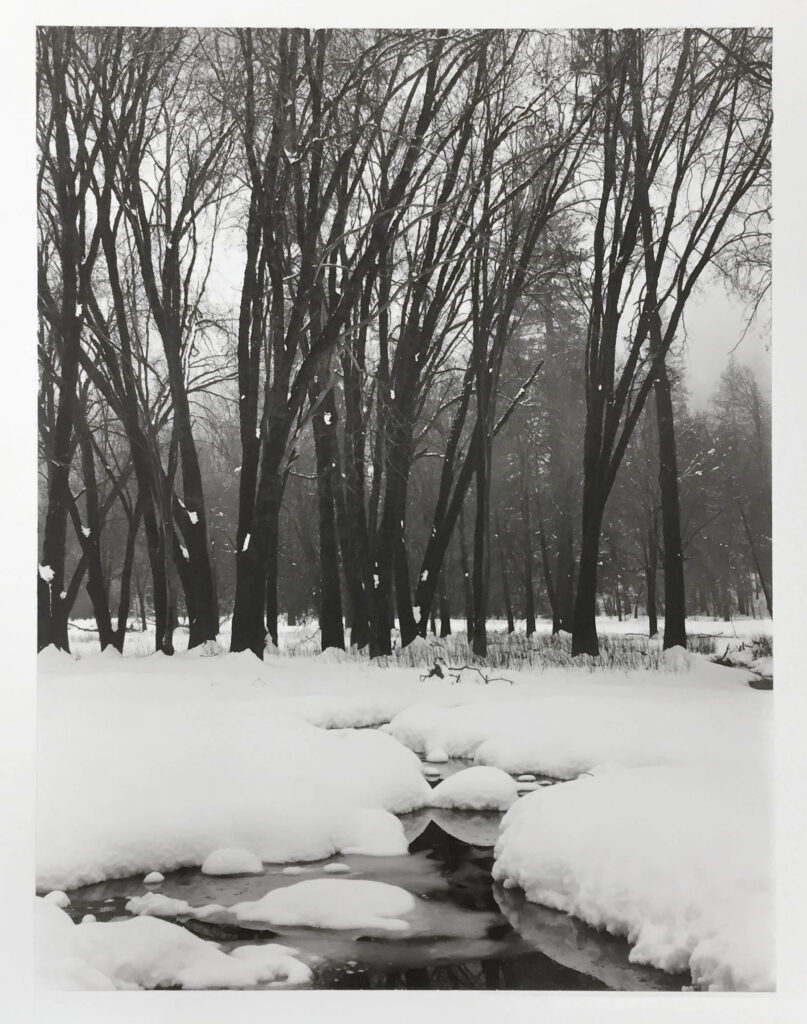
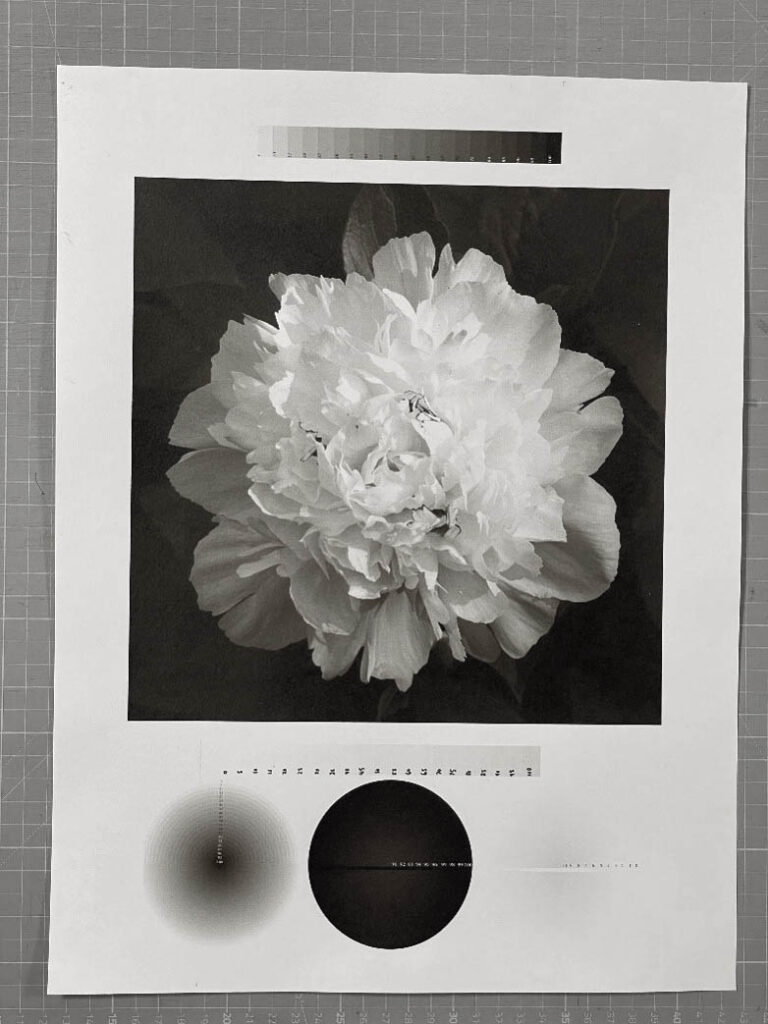
Below is a two-layer carbon transfer print made with DAS-sensitized emulsions and a traditional silver negative. The negative was taken by Jim Fitzgerald.
Here’s a print made from a continuous tone inkjet negative and a variable contrast DAS-sensitized emulsion. This was one exposure and one layer. When I start giving carbon workshops again in 2027/2028, I’ll teach how to make variable contrast emulsions.
Nitrogen bubbles. The photo to the right shows an extreme example of nitrogen bubbles. The image layer is so thick that the nitrogen was unable to escape and is permanently trapped in the layer of gelatin. Below are two good tricks for controlling these bubbles.
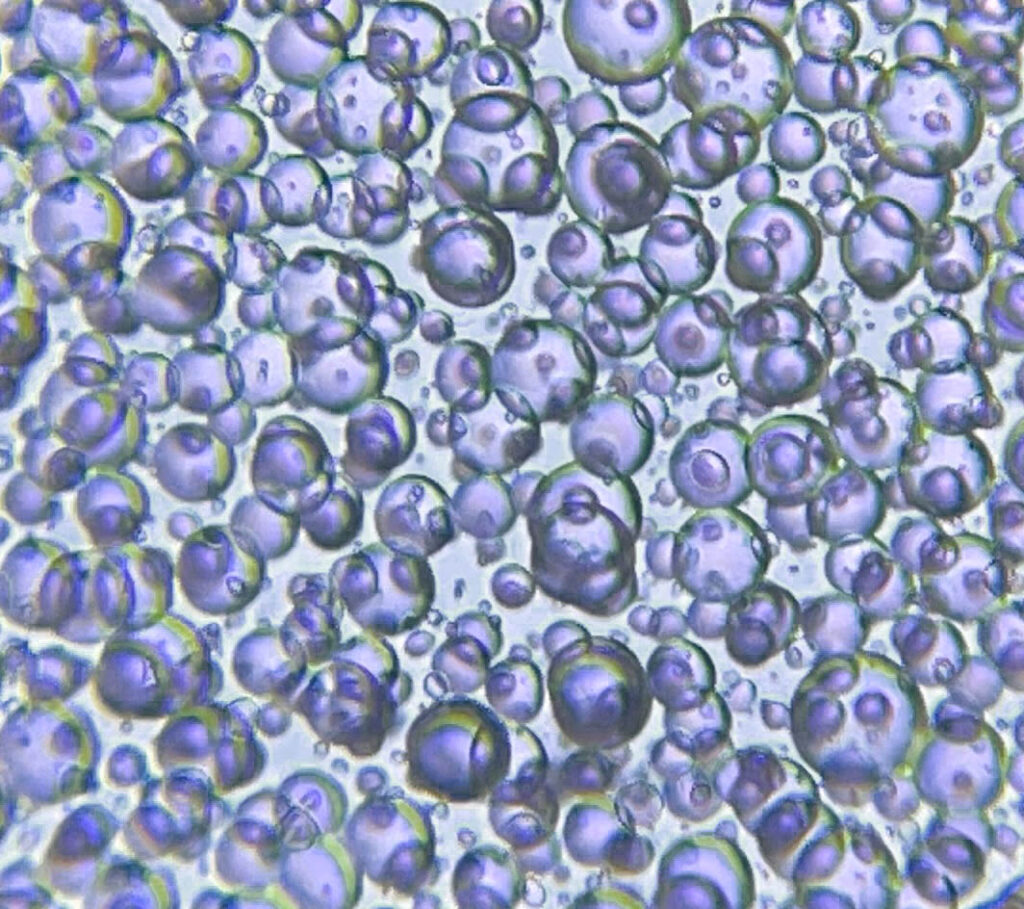
If you do those two things, then you should never have problems with nitrogen bubbles, however, here are some other things you can do.
Staining. One more disadvantage of DAS is the staining of the final paper support. DAS can leech into the paper, then when exposed to UV light, the paper turns yellow. It is important to clear/bleach the paper before exposing the paper to UV light. Some papers are very difficult to clear, but Hahnemühle Platinum Rag is very easy. Another way to avoid sensitizer staining is to make double or triple-transfer carbon prints. Below is the recipe I use to clear/bleach prints. It is adapted from the Ultrastable Process by Charles Berger.
It seems like supplies for DAS are dwindling. Most of my suppliers in Europe have run out of stock, and my last order from Switzerland was a deep brick red, which isn’t ideal. See the differences in color in the photo below. A lighter color means less stilbene dye and a higher quality product.
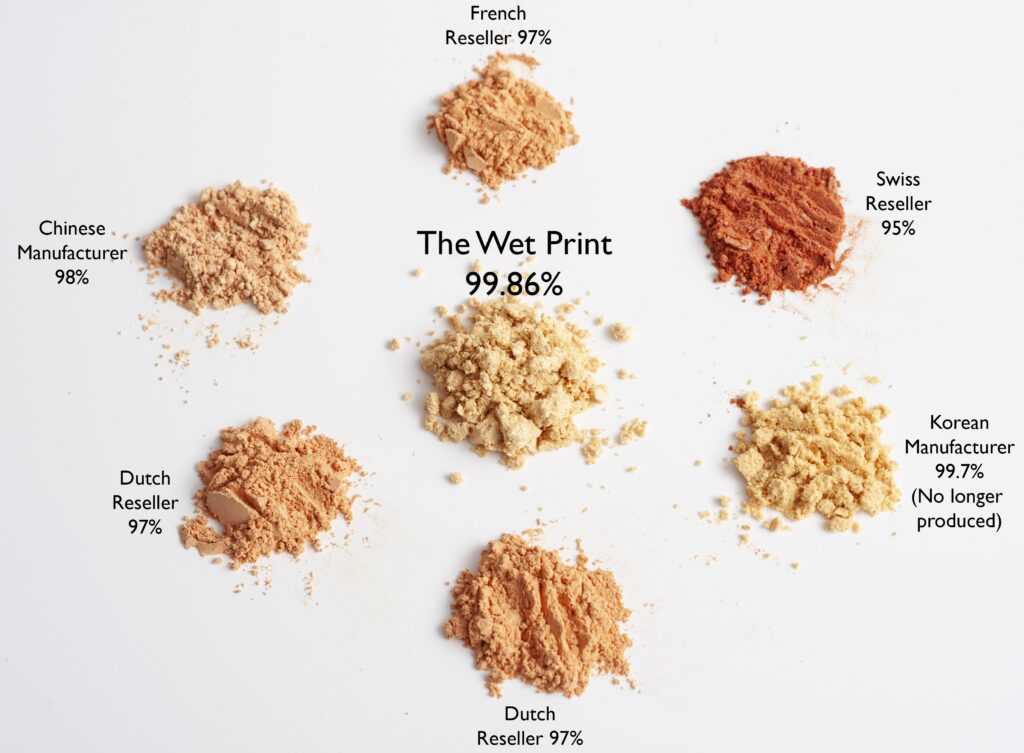
I tried ordering from a manufacturer in China and lost 2,500 euros because the package was ‘lost’ in transit. I suspect that they never shipped it. To solve this problem, in 2023 I put together a group order from one of the last reputable manufacturers. It had to be a group order because the minimum order was 130kg! I ordered 160kg. That’s enough to make well over half a million 8×10” prints. I have 40kg left, of which I’ll keep 20kg for myself as a lifetime supply for the rest of my carbon printing career. The other 20kg I’ve made available on The Wet Print website, and on Amazon for those living in the USA. There are a few other places to purchase DAS (CAS 2718-90-3), but you’ll often pay more, and the purity is nowhere near the 99.86% I got from the group order.
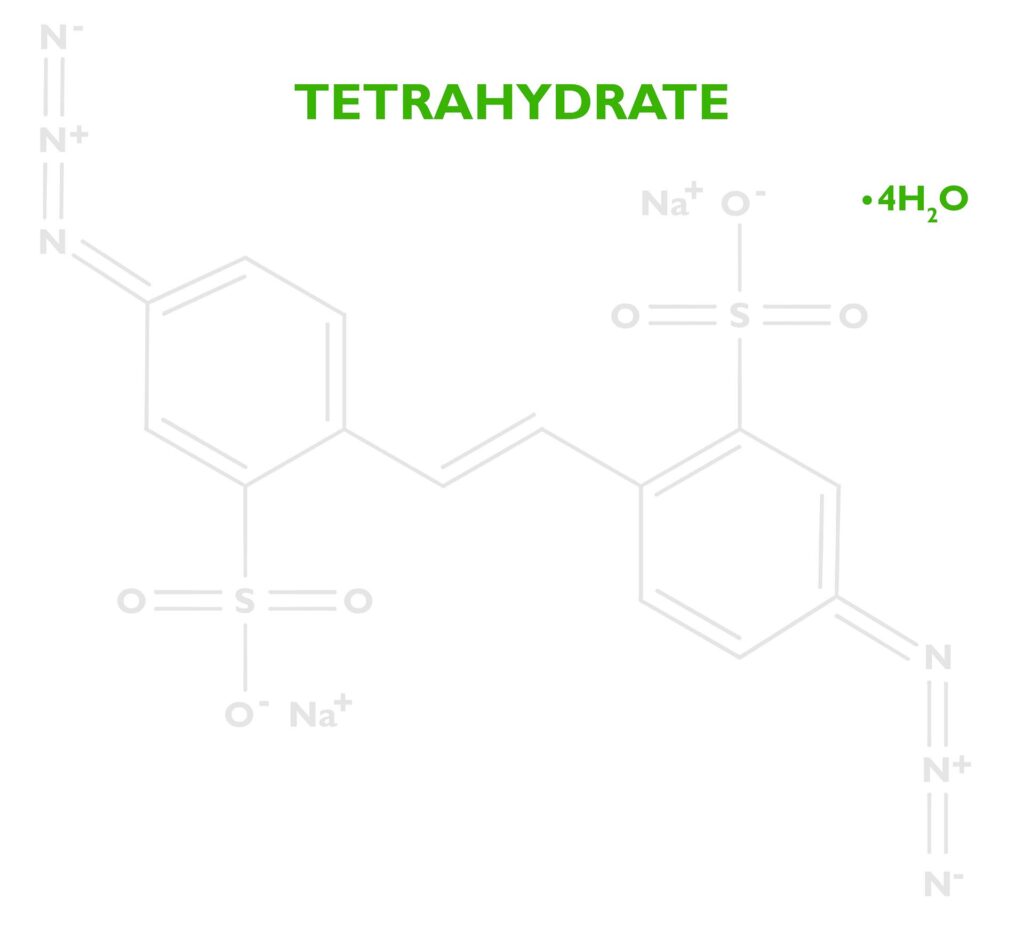
For the very curious reader, let’s go back to the molecule Disodium 4,4’-diazidostilbene-2,2’-disulfonate tetrahydrate. We know now what the diazidostilbene does, but what about the sodium, sulfonate, and water? (Disclaimer- I’m not a chemist, but I think I have pieced together why DAS works so well for carbon printing. If you have any more information, please email me.)
Safety: To improve the safety and stability of the molecule, we want to add more atoms in proportion to the azides. “The “Rule of Six” states: If a substance presents at least six atoms of carbon (or other atoms of approximately the same size) per energetic functionality (ExFG), this should render the molecule relatively safe to handle” (Peer, 1998, 256 – 263). In essence, the potentially explosive azide part of the molecule is diluted, rendering it safe to handle. The extra water (tetrahydrate from the recrystallization and purification step of production) most likely makes it safer as well.
I had flammability and flash point testing conducted by Eurofins, which show DAS is safe to handle with no need for hazmat shipping. It’s about as flammable as most woods. Here are the test results if you are interested.
Stability: I have no source for this, but my guess is a larger molecule also lends to the stability of DAS. A stable emulsion will show no change in performance over long periods of time. A small diazido molecule might be too sensitive to heat, or oxygen to create a stable emulsion.
Solubility: Diazidostilbene is a nonpolar molecule, so it’s not soluble in water. Both sulfonic acid and sodium increase the solubility. Kosar states in his book Light Sensitive Systems, that “sodium salts of these acids are water soluble” (Kosar, 1965, p. 331). Since carbon transfer printing is a water-based process, a water-soluble sensitizer is important.
We all have Charles Berger to thank for the introduction of DAS into carbon printing. He invented the UltraStable process, which had emulsions you could purchase to make color carbon prints. The emulsions were pre-sensitized with DAS, and if you can find a box today, they still work just fine. Amazing considering the emulsions would be over 25 years old!
Click here to download the Safety Data Sheet for DAS
References:
Kosar, J. (1965). Light-sensitive systems: Chemistry and application of nonsilver halide photographic processes. J. Wiley.
Peer, M. Spec. Chem. 1998, 18, 256 – 263
Prucker O, Brandstetter T, Rühe J. Surface-attached hydrogel coatings via C,H-insertion crosslinking for biomedical and bioanalytical applications (Review). Biointerphases. 2017 Dec 8;13(1):010801. doi: 10.1116/1.4999786. PMID: 29221372.